Kodi raspberry pi 3 movistar
how to watch disney plus on raspberry pi – netflix spotify etc.
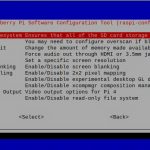
Install Libreelec not have much secret, download the image record it on the SD and put it in the Raspberry, once installed the necessary addons are within the distribution will need two in the section of PVR the simpleiptv and in the section of services the Webgrab + which is actually a docker that lowers the application «ready to use», You may have noticed that comes with quotation marks because start it will have more war than I thought at first, with everything installed and without having done anything you will be asked to restart, this will not be the first or the second reboot do not panic.
Let’s suppose that you already have your membership, your username, your password, and your encryption key that you have obtained in your forum (you can ask me privately about this if it is not explained in another forum, later I will make a tutorial on this point).
Copy to the file as many lines as channels you have in your iptv list, it is possible that your iptv list has repeated channels, the most practical solution that I have done is to create a line with the same origin but with different name to duplicate the content in the style of this one.
how to turn the raspberry pi into a movistar decoder
If you go to the compilation of Kodi addons of Mr. Kamber in you will find several that serve to see this type of channels among others, including DTT (if you do not have an antenna on the TV) I recommend the V12 version which is the latest he has published, quite polished and without many errors.
I’m thinking of buying the raspberry for emulators … but I’m also interested in q addons to watch live soccer … since my idea is to remove the soccer in movistar at the end of season q the offer runs out … and replace it with the raspberry aunq my initial idea was the tvbox … but being through kodi in tvbox I’m looking at the rasp better since it also has the kodi …
raspberry pi tvheadend & kodi server setup
So you have to be registered in movistar right? I thought it would be some kind of IPTv addon. Too bad they are so expensive because I am not registered. Thanks for the info, I keep it in case I have a colleague who is a member and I can scrounge.
The recordings in the cloud are available on all computers (are synchronized as the original deco) and the good thing is that you can make recordings on file, which the original deco can not. For me this is fundamental.
The cloud recordings are available on all devices (they are synchronized like the original deco) and the good thing is that you can make recordings in file, which the original deco cannot. For me this is fundamental.
The cloud recordings are available on all devices (they are synchronized like the original deco) and the good thing is that you can make recordings in file, which the original deco cannot. For me it is fundamental.
xteve | the best guide | iptv on plex | movistar | #3
What we acquire when we buy a Raspberry Pi is simply what you see in the picture below. So we must buy a microSD card that will serve as a boot disk, a charger to power it (it is recommended that at least 2 Amps) and a box to protect the board.
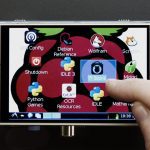
In this review we are going to evaluate the Media Center KODI formerly known as «Xbox Media Center» or XBMC. And we are going to use it on a Linux distribution created just to use this Media Center and therefore optimized for its use and that will greatly facilitate its use and installation. This Linux distribution is the well-known OpenELEC .
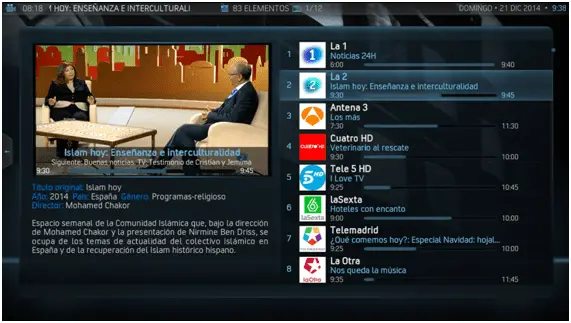
The installation of this plugin in KODI is like with the rest, you download the ZIP with the plugin, in KODI you go to «System -> Settings -> Add-ons» and select «install from a .zip file», select the downloaded zip and that’s it. Once downloaded, look for the plugin in «My add-ons» in the PVR Clients section (it is called PVR Movistar+ TV) and activate it. You must also have the TV option activated in KODI, to do this go to «System -> Settings -> TV» and in the «General» section check that «Enabled» is on.