Encender led arduino bluetooth hc-06
Bluetooth module hc-06 with arduino and android
In this tutorial we will learn how to configure some parameters of the Bluetooth Module HC-06, such as: change the baud rate, the name and pairing code, among other things. This tutorial only applies to the Bluetooth Module HC-06, for the HC-05 the configuration is different for which we have made a separate tutorial. The Bluetooth Module HC-06 allows the configuration of some of its operating parameters by using AT commands. The AT commands are a list of commands that always start with the letters AT, these commands are sent through a serial port so we will need an Arduino or USB Serial Converter to send the commands from our PC.
– All the data entered to the HC-06 through the RX pin is transmitted via Bluetooth to the connected device, and the received data is returned through the TX pin. The communication is transparent to the programmer.
Having understood the above, let’s see the connections to configure the HC-06. You can make a program or «sketch» in Arduino to do all the configuration, but we will do it manually from the PC, this can be done in two ways:
Hc-05 bluetooth module in tinkercad
If you do not attach the sketch that you are using and that does not work (use the proper tags for the code), we can hardly know what you are doing wrong, nor have you put what application you are using on Android.
I deduce that you have connected the bluetooth to pins 0 and 1, since I don’t see any definition of a software serial port (SoftwareSerial library).if you are going to use the serial monitor you can’t use pins 0 and 1 for your bluetooth connection,you will have to define a software serial port and connect the bluetooth there.
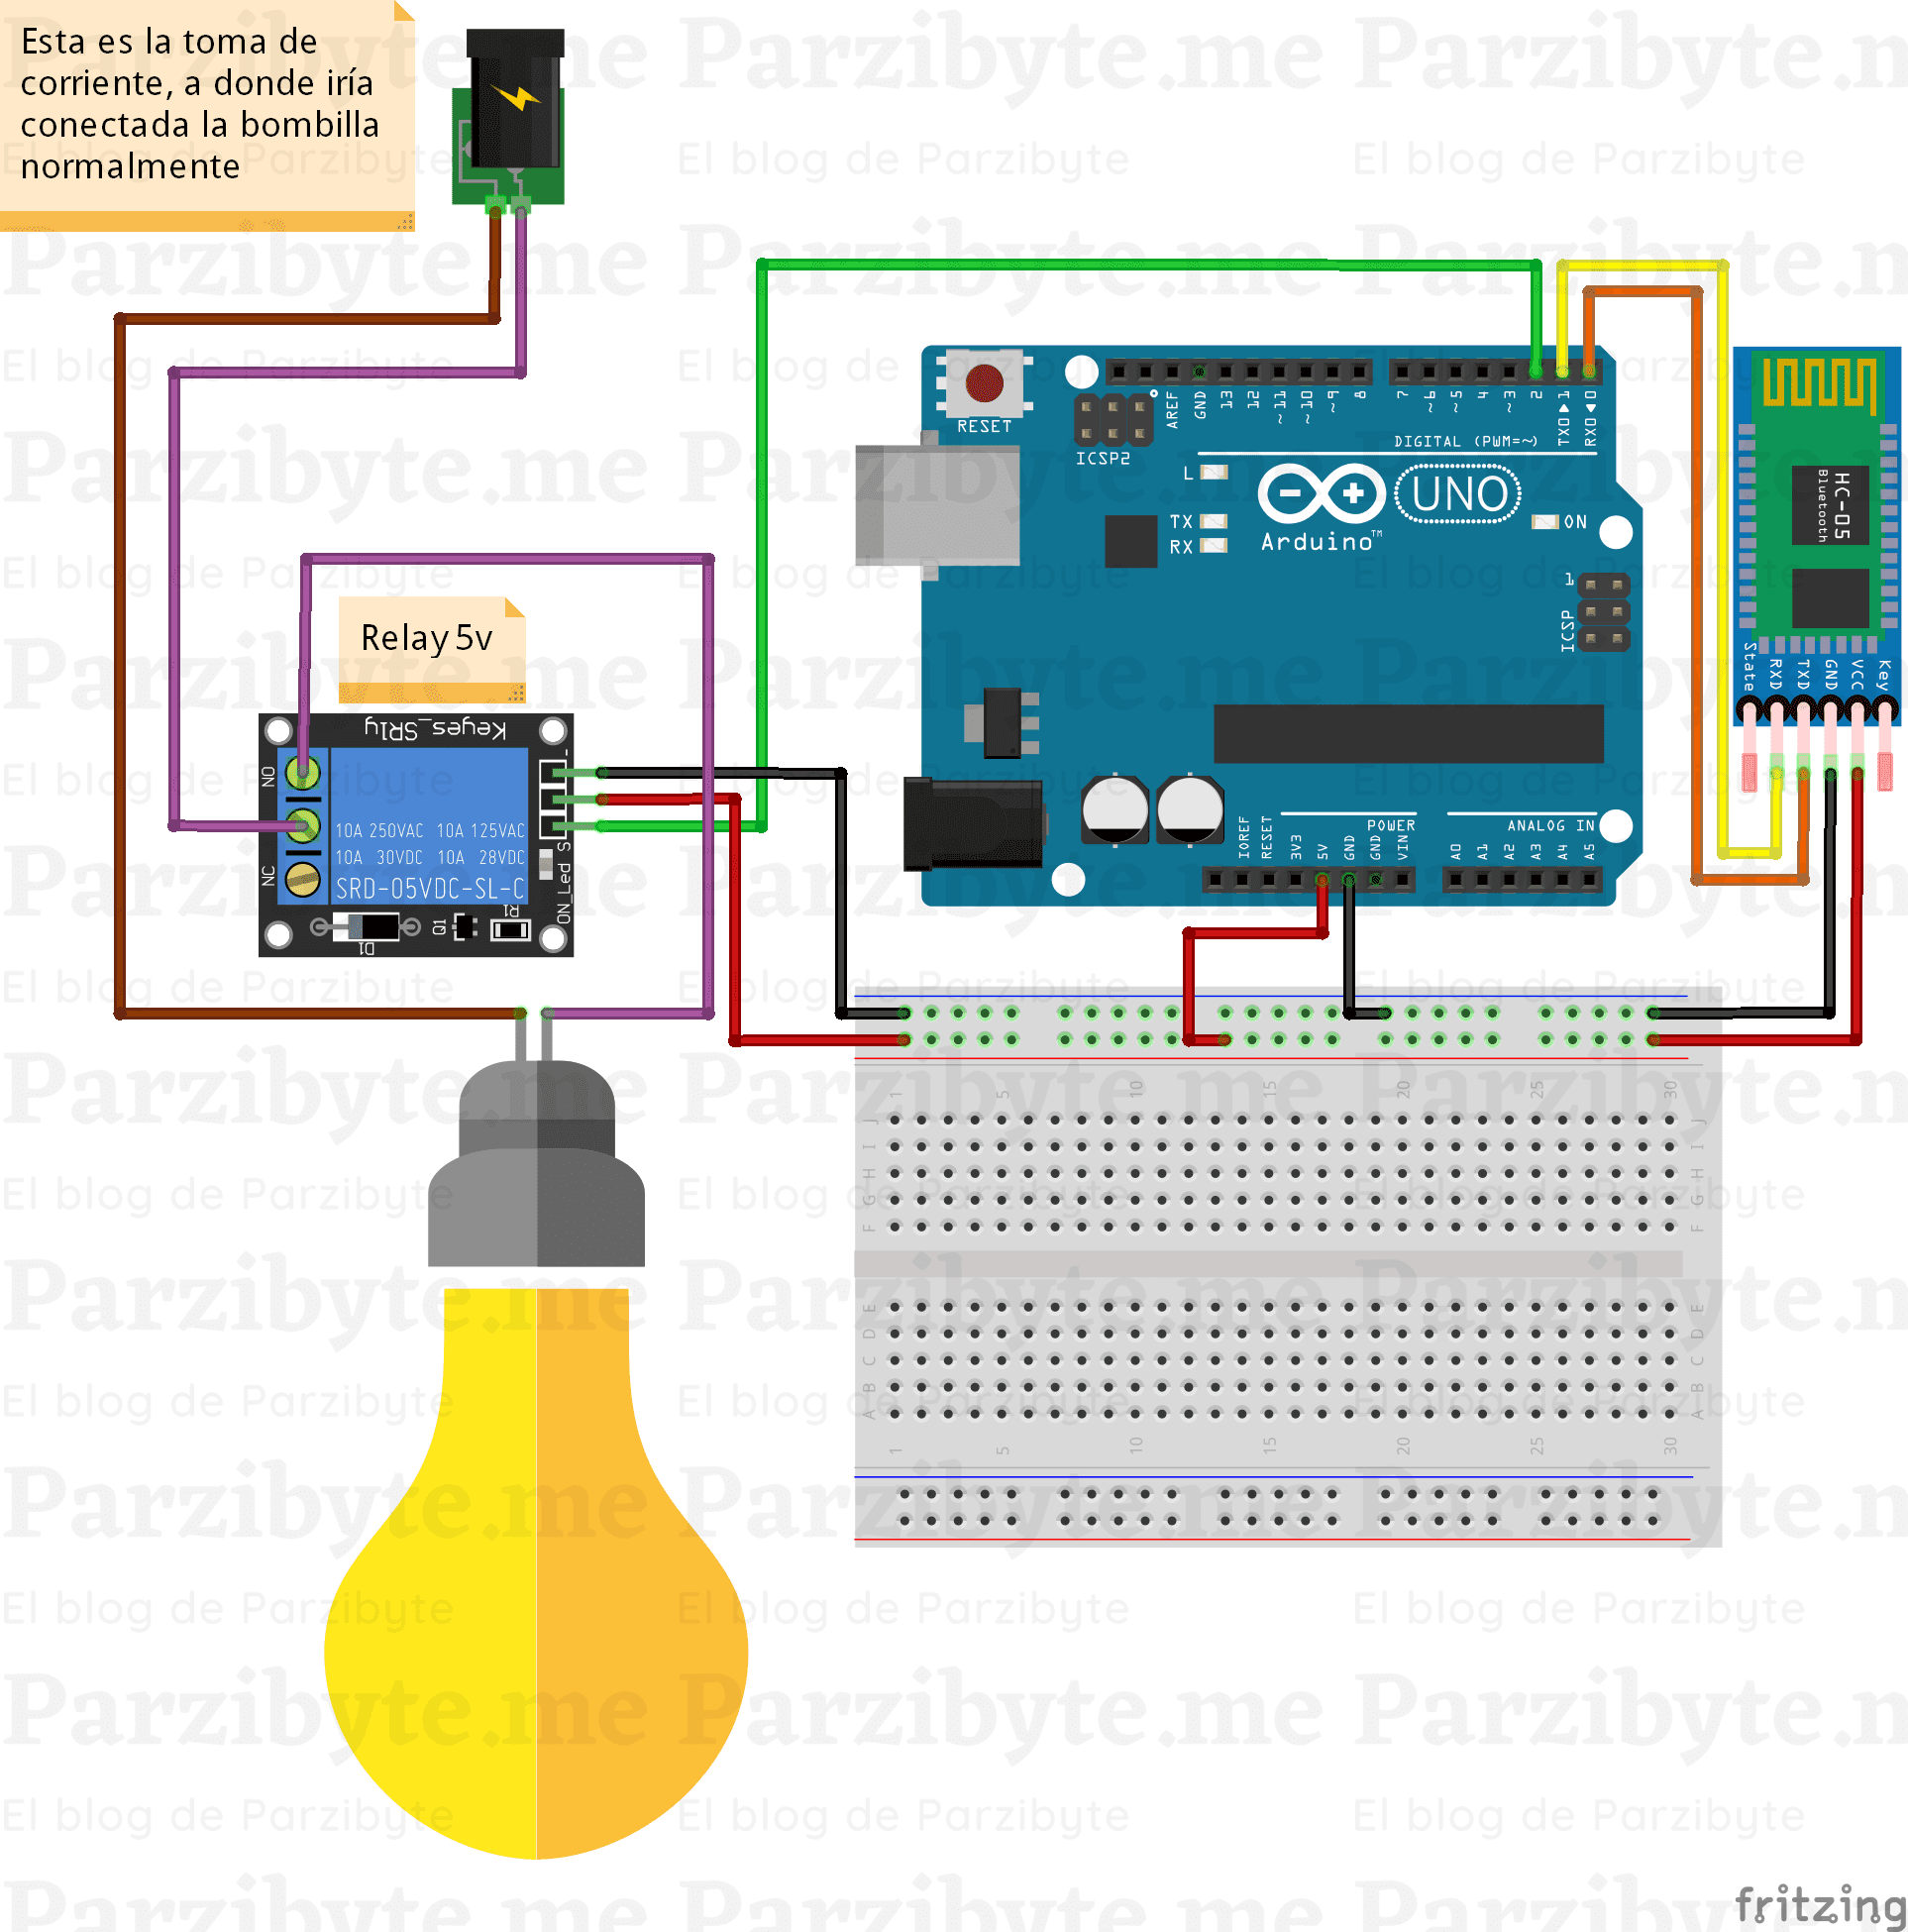
Turn on leds by bluetooth with arduino
Now we will upload the program to the arduino board by pressing the button on the top left side (button enclosed in the red circle).remember that in order to upload the program we must connect the Arduino board to the pc through the USB 2.0 printer cable. Then we connect the Bluetooth modulator to the Arduino board, we introduce to the pin4,5,6,7,8,9,10 and 11 slots of the Arduino the 8 leds (the longest leg of the voltage Led and the shortest leg to ground).We create an application in inventor app, where we have 4 buttons:Button 1 (ListPicker) with the Image: Connect BluetoothButton 2: Turn on first sequence (Click) or Turn off (Long Click) depending on the InstructionButton 3: Turn on second sequence (Click) or Turn off (Long Click) depending on the InstructionButton 4: Turn on third sequence (Click) or Turn off (Long Click) depending on the Instruction.
Note: Let’s not forget to add the Bluetooth Device by going to the left side clicking on the Connectivity tab and selecting BluetoothClient as shown in the image:After having done the design we press the (Blocks) Button, to make the block structure of the apk.
Bluetooth module arduino projects
– In three tutorials we will see how we can control a stroller with two DC motors, from the mobile using Arduino and Bluetooth. – Arduino + Bluetooth + Motor controller + Motorcitos + App inventor.
(There are more updated IDE, you can have in your computer several versions of IDE, for now install IDE 1.0.6 that loads faster, at any time you can install other IDE more updated, but for now try with IDE 1.0.6)
The first thing is to connect our Bluetooth module to the Arduino. We must be very careful not to swap the power supply Vcc (+) and Gnd (-), if we make a mistake and connect it in the wrong place the module will break down immediately.
In the photo above I show how I have connected the Bluetooty module to the Arduino. The supplied cable has a female connection, the Arduino also has female connections, so I have used four intermediate colored wires to connect it.
It is important to follow a color code, red for positive, black for negative, this way we will be more careful when connecting the + and -, because if we change it, the module will break down. During the process of loading the program we will remove and put several times these cables, to be able to load the program to the Arduino, because if the BT power supply is connected, sometimes it does not load the program, so we remove the red power cable, load the program and put the red cable back.

